Tuesday, June 1, 2010

Collage Stamping Tutorial


Today, Michelle Bartnett is going to show you how to do Collage Stamping!

I love the look of collage stamping and I think it’s a lot of fun. This is a very forgiving technique too so don’t worry….you can do it!!

Supplies Needed:

  • Inks - You’ll need at least 4 variations of the same color. I have used a very light (Bashful Blue), medium light (Tempting Turquoise), medium dark (Taken with Teal) and dark (Pacific Point). You’ll also need a black ink.
  • Stamps - You are going to want a set that has one kinda large image that can remain mostly white, swirls or leafy vines of some sort are a must, and several other images and sentiments of different sizes. I have used the Paisleys and Peacocks set here.
  • Sponges
  • Masking supplies such as Eclipse tape, sticky notes or embossing supplies
  • Cardstock - I prefer something with a slick texture such as Whisper White

First, stamp the large mostly white image off center (I went to the upper left). Mask or clear emboss this image.

Sponge the lightest ink (I used Bashful Blue) around this image. Don’t worry about the edges of your inking, its perfect if they are rough and not any particular shape.


Sponge the top 2/3's of the piece in the medium light ink (I used Tempting Turquoise). This is best if done kinda sloppy - leave some lighter and darker areas. (I told you this was forgiving) Don't completely cover your lightest area with that main image. Just sponge up into it a bit and allow the edges to blend together.


Sponge the bottom 1/3 with the medium dark ink (I used Taken with Teal).
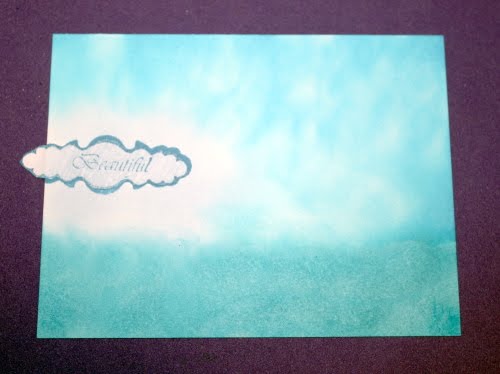

Sponge in some areas all around the edges randomly with the darkest ink (I used Pacific Point).

Start filling in the piece by stamping a few of the larger images in various colors. Don’t be afraid to allow only part of an image to make it onto the piece near the edges. Also try stamping twice before inking again for more interest. Notice that I accidentally stamped an inky edge of the rubber in the upper right. Again, I said this was forgiving, so I’ll be able to stamp right over that again later and you’ll never notice it. You are not trying to completely cover the piece yet so leave some open space.


Now stamp a few of the larger sentiments with various colors of ink. See how I just stamped over that litter error with the word “Impressive” in the upper right! You are still not trying to cover the whole piece yet so continue to leave some open spaces.


Here we are at my favorite part! Stamp the smaller images all over in various colors and again, don’t be afraid to stamp twice before inking for even more variation. Let the images overlap a bit also. Everywhere you look at this piece, you want to see light and dark images and large and small images. I have a hard time stopping myself here! Leave only one open spot in the lower right quadrant.


And for the final accent, I stamp one image in black in the lower right quadrant.


Tip: Don’t clean your stamps after each use. Wait until the very end. You’ll keep reusing them along the way. I just keep mine in a pile on a scrap piece of paper so they are ready to go. Sometimes I ink, stamp on this scrap and then go to my piece before inking again.


Here’s a sample done in Browns using the Into the Moonlight and Fictionally Inspired sets.


And here’s a sample in grey that breaks all the rules (only 3 colors of ink, no swirly stamp, etc.) but it still turned out great.


I hope you’ll give collage stamping a try! Enjoy!

Monday, May 31, 2010

Twilight Inspired....


Don't forget to sign up for our DT and Customer Twilight Blog Hop! See the details in this post!


Card by DT member, Jackie Rakoski

using Pick a Pocket Piece and Into the Moonlight

Saturday, May 29, 2010

Think INK inspiration...

Using Pick a Pocket Piece, here is some inspiration for the current Think INK Challenge- you don't have to use this set, but it is PERFECT for it, wink wink!

Michelle


Alicia


Patti


Be sure to play along for your chance to win a grab bag of AI stamps!

Tuesday, May 25, 2010

Think INK Challenge #21


This week your challenge is brought to you by our DT member, Kim Nath, and she wants you to THINK POCKETS. It can be any type of pocket, pockets on a scrapbook page or card, our new Pick a Pocket Piece is PERFECT for this challenge, or here are some links for inspiration:

pocket cards: http://www.splitcoaststampers.com/resources/tutorials/pocket_card/

crimped envelope pocket card: http://www.splitcoaststampers.com/resources/tutorials/crimpedenvelope/

criss cross card: http://www.splitcoaststampers.com/resources/tutorials/criss_cross_card/

Diagonal double pocket card: http://www.splitcoaststampers.com/resources/tutorials/diagonal_double_pocket_card/

double pocket card: http://www.splitcoaststampers.com/resources/tutorials/doublepocketcard/

mini photo book: http://www.splitcoaststampers.com/resources/tutorials/mini_photo_book/

tea bag holder: http://www.splitcoaststampers.com/resources/tutorials/teabagholder/

Trifold pocket card: http://www.splitcoaststampers.com/resources/tutorials/trifold_pocket_card/


For Inspiration Kim used the new set, Pick a Pocket Piece to come up with this gorgeous card:


* You are not required to use AI stamps, but if you have them, we'd love to see you use them!
**IF YOU USE AI STAMPS, YOU GET 2 ENTRIES FOR YOUR CREATION! JUST ENTER YOUR NAME/LINK TWICE ON MR. LINKY!!!


* You have until Monday, June 7 , 2010, midnight Pacific Standard Time to link your creation to this post. A winner will be chosen Tuesday, June 8, 2010 to win a GRAB BAG of AI STAMPS!

* When posting your link, please post the link directly to your creation- so if it's on your blog, please link it directly to the specific post with your creation.

* If uploading to SCS or PCP, please add the keyword AIC21

Can't wait to see what you come up with! Tell your friends!


Sunday, May 23, 2010

Think INK Inspiration!

It's that time again, time to share some fabulous Design Team Inspiration for the current Think INK challenge! The current Think INK Challenge is to create a card that has 3 buttons, 2 ribbons and 1 circle, it really is as simple as 1, 2, 3!

Cheryl used our spunky Steampunk Sarah for her creation!

Marti pulled out her Greek Gardens set for her 3, 2, 1 challenge!

Joy went wild with Rodeo Rodent!

I hope that these creations are giving you some ideas, they certainly inspired me! Hope to see your creations too, you never know, it could be your name drawn this week!

Saturday, May 22, 2010

Twilight Challenge Month...


In addition to our Twlight themed blog hop at the end of June to celebrate the release of Eclipse, we're having a MONTH LONG Twilight themed CHALLENGE FOR OUR BELOVED CUSTOMERS!

What can you win? How about a $25 Gift Certificate to the store, as well as being our featured Customer on the Blog ALL MONTH LONG!!

Deets: We'll be starting Weekly Challenges starting June 3rd. We will have 4 challenges, one per week, each will be posted on a Thursday. You will have one week to complete your challenge piece. You will be required to participated in each challenge, each week, to be eligible to win. An overall winner will be chosen on July 1st.

To participate, you can use any of our fantastic Twilight Themed Stamp sets....


or you can use ANY Artful INKables stamp set to create a Twilight themed card/project. You MUST use AI stamps as the main focus of your cards/projects. You have plenty of time to get some fabulous stamps in order to participate in the challenges and the HOP!

Friday, May 21, 2010

Blog Hop Winners!

Can you believe that it is already Friday?! Well I hope everyone had a fabulous week, and it is time to pick the winners from our May Release Blog Hop! Here are the lucky two ladies!

Beryl

AND

Teela

Huge congrats ladies! You both will receive one of the newly released stamp sets of your choice PLUS you will get a one time use only 10% off coupon at Artful Inkables! Now that is a prize or what?! I am sending your e-mails out now, I can't wait to see what everyone creates with these fabulous new stamp stets! Keep sticking around the AI Blog, you never know what you might see next!