
Today, Michelle Bartnett is going to show you how to do Collage Stamping!
I love the look of collage stamping and I think it’s a lot of fun. This is a very forgiving technique too so don’t worry….you can do it!!

Supplies Needed:
- Inks - You’ll need at least 4 variations of the same color. I have used a very light (Bashful Blue), medium light (Tempting Turquoise), medium dark (Taken with Teal) and dark (Pacific Point). You’ll also need a black ink.
- Stamps - You are going to want a set that has one kinda large image that can remain mostly white, swirls or leafy vines of some sort are a must, and several other images and sentiments of different sizes. I have used the Paisleys and Peacocks set here.
- Sponges
- Masking supplies such as Eclipse tape, sticky notes or embossing supplies
- Cardstock - I prefer something with a slick texture such as Whisper White
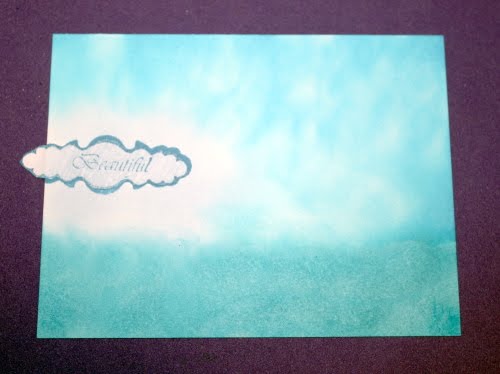
First, stamp the large mostly white image off center (I went to the upper left). Mask or clear emboss this image.

Sponge the lightest ink (I used Bashful Blue) around this image. Don’t worry about the edges of your inking, its perfect if they are rough and not any particular shape.

Sponge the top 2/3's of the piece in the medium light ink (I used Tempting Turquoise). This is best if done kinda sloppy - leave some lighter and darker areas. (I told you this was forgiving) Don't completely cover your lightest area with that main image. Just sponge up into it a bit and allow the edges to blend together.

Sponge the bottom 1/3 with the medium dark ink (I used Taken with Teal).
Sponge in some areas all around the edges randomly with the darkest ink (I used Pacific Point).
Start filling in the piece by stamping a few of the larger images in various colors. Don’t be afraid to allow only part of an image to make it onto the piece near the edges. Also try stamping twice before inking again for more interest. Notice that I accidentally stamped an inky edge of the rubber in the upper right. Again, I said this was forgiving, so I’ll be able to stamp right over that again later and you’ll never notice it. You are not trying to completely cover the piece yet so leave some open space.

Now stamp a few of the larger sentiments with various colors of ink. See how I just stamped over that litter error with the word “Impressive” in the upper right! You are still not trying to cover the whole piece yet so continue to leave some open spaces.

Here we are at my favorite part! Stamp the smaller images all over in various colors and again, don’t be afraid to stamp twice before inking for even more variation. Let the images overlap a bit also. Everywhere you look at this piece, you want to see light and dark images and large and small images. I have a hard time stopping myself here! Leave only one open spot in the lower right quadrant.

And for the final accent, I stamp one image in black in the lower right quadrant.

Tip: Don’t clean your stamps after each use. Wait until the very end. You’ll keep reusing them along the way. I just keep mine in a pile on a scrap piece of paper so they are ready to go. Sometimes I ink, stamp on this scrap and then go to my piece before inking again.

Here’s a sample done in Browns using the Into the Moonlight and Fictionally Inspired sets.

And here’s a sample in grey that breaks all the rules (only 3 colors of ink, no swirly stamp, etc.) but it still turned out great.

I hope you’ll give collage stamping a try! Enjoy!
5 comments:
This is super cool! I totally have to try it.
this absolutely ROCKS!!!!
Oh Wow Michelle! I love this technique, I am so going to have to try this one! Thanks for sharing!
Wonderful tutorial and beautiful samples, thanks!
Post a Comment